Farm Life: Chores
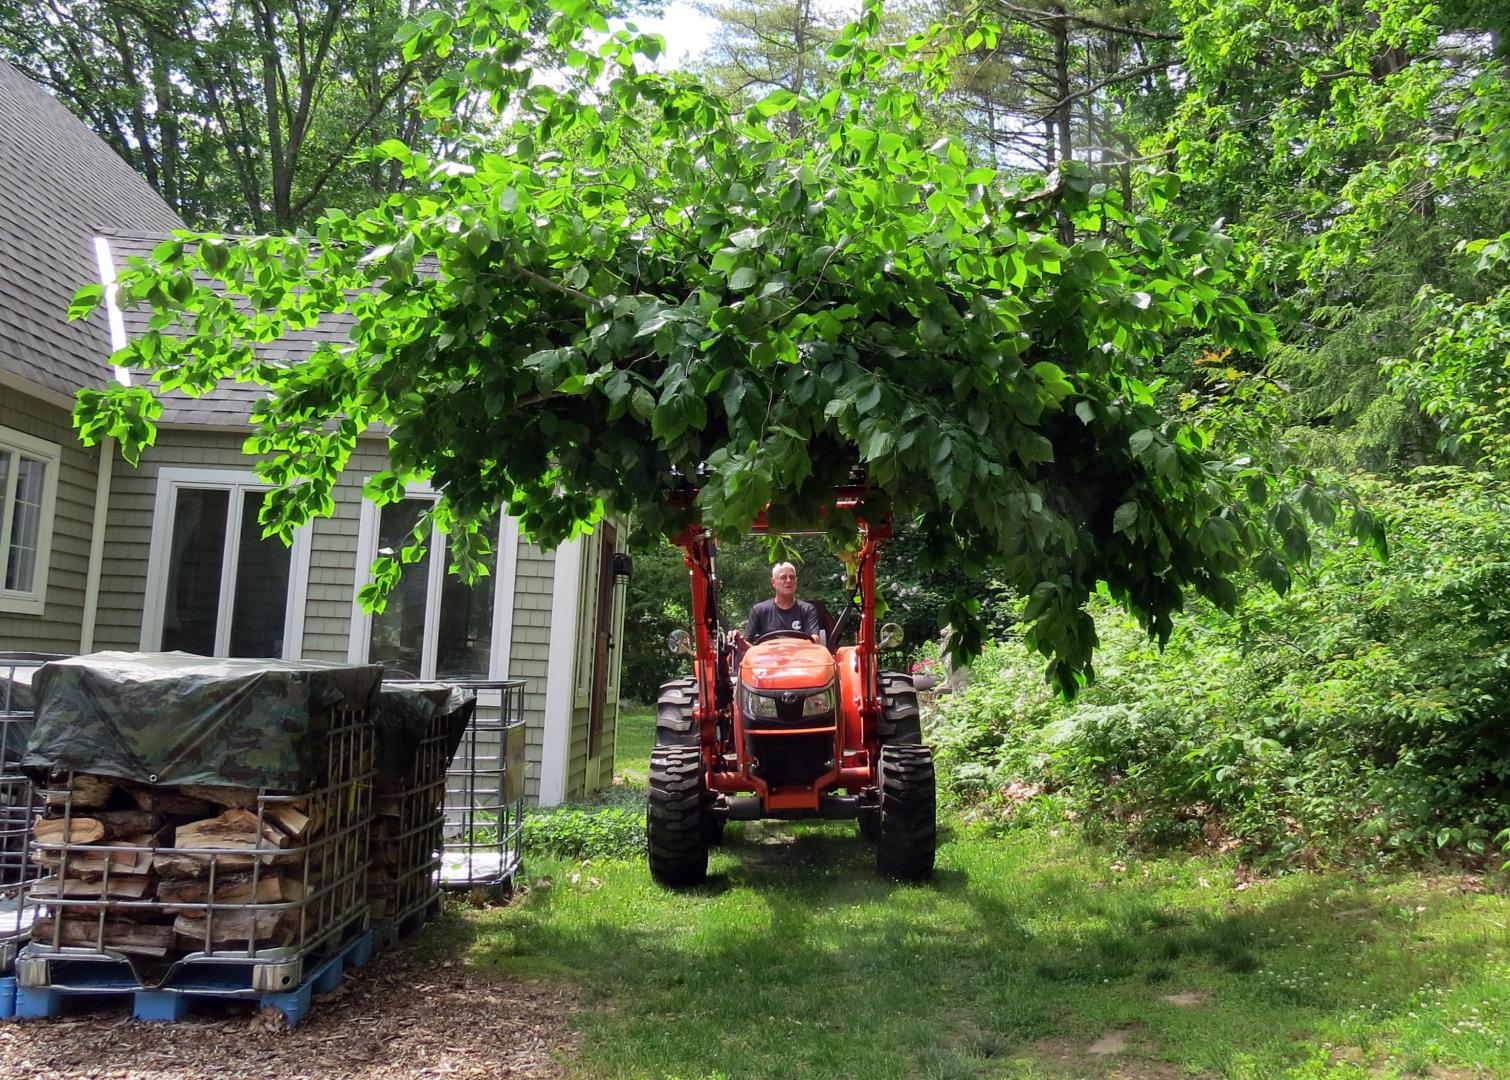
Chores are a part of the fabric of our life; a part of all farmer’s lives. If you are reading this because you are curious; or contemplating or just getting started homesteading, this may help you understand some of what’s involved. We will likely write essays like this one from time to time and incorporate equipment reviews along the way. It will give us a chance to share with you the rhythm of our farm life. Like all people who work their land, some of the rhythm of our lives is dictated the seasons and weather. When it rains, snows or is bitter cold and it isn’t practical to work outside, I write. So it kind works out. As I write this we have just passed summer solstice. The days are long and warm; we rise early and go to bed at sundown which feels natural and good. It’s the season for outdoor projects; winter is the time for indoor projects and working in the woodshop.
We like being outside and chores are a reason to be there. Because I’m semi-retired and only work part time, I often work alone during the week. But when Kristine is home on the weekend or has time off, we work together. She is a hard worker and we get a lot done… I treasure our time working together. It’s not drudgery, far from it. It is a chance to learn and grow together. And, it’s honest work and that’s important to me. As you will see below and elsewhere on this site, Kristine is right in the thick of it. She pretty much does the same things I do. OK, maybe she doesn’t run my big chainsaw with the 25” bar, but she runs the smaller saws. She climbs ladders, uses power tools, rakes leaves and drives the tractors.
Maintenance is a fact of life… well, at least for many of us. If you own equipment, you would be wise to maintain it. We have a lot of equipment and we do regular maintenance; oil changes, greasing, filter changes, etc. It takes time but I want our equipment to last and I certainly don’t want to have to replace it. For the most part we don’t leave equipment outside. But, I don’t have enough storage space for everything. My two antique tractors get winterized and are wrapped in tarps for the winter. Of all the implements I own, I placed a tractor rear scraper blade on a pallet (off the ground) and tarped it. It lived outside for the winter, but this is the simplest of implements; with no motor and minimal moving parts so it was a good choice. It was the only implement outside for the winter.
Having equipment often makes farm maintenance easier. In the picture below I am changing the mower blades on my riding mower. If you have done it, you know it can be an awkward task. I ran a chain around the front brush guard and lifted the front end with one of my tractors. I know, you are not supposed to work under a suspended load. The tractor is a couple years old, the chain is good… sometimes you just do what you need to do. One of my friends scolded me about this. My response was it would have taken longer to crib up the tractor than it did to change the blades!
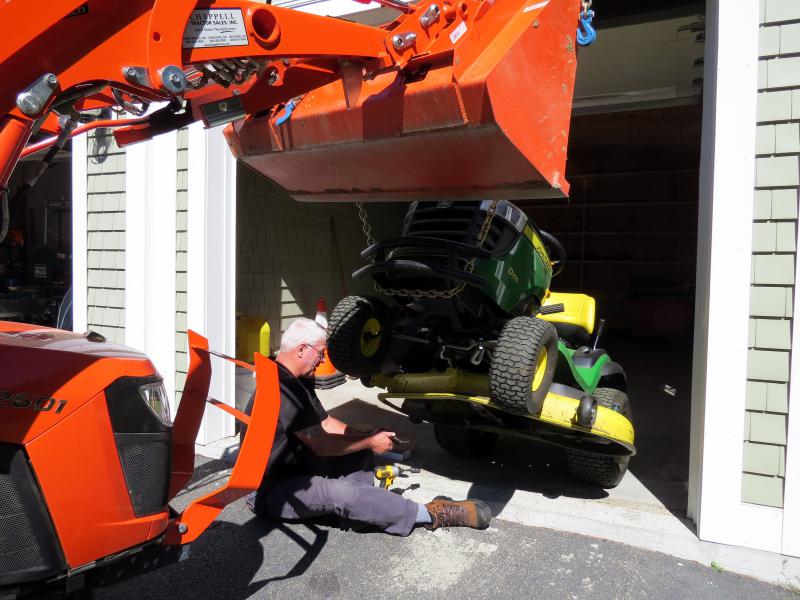
Changing Mower Blades
We had an inexpensive electric pressure washer for several years. It was OK at best. I bought a Simpson 3300 psi pressure washer recently. It came with a Honda GC190 engine. I buy Honda when I can because of the quality. This is a powerful compact pressure washer that sells for $450 at Tractor Supply. It is a very compact unit that doesn’t take up a lot of space in the shed. Part of Simpson’s effort to keep it compact includes a very short handle; you have to bend over to move it around, which is not ideal. The placement of the water inlet for the garden hose is awkward as well. When Kristine went to unscrew the hose right after running the washer, she got a nasty burn on the back of her elbow from the engine. She won’t do it again, next time she will reach in from the side, but a heat shield would have been nice.
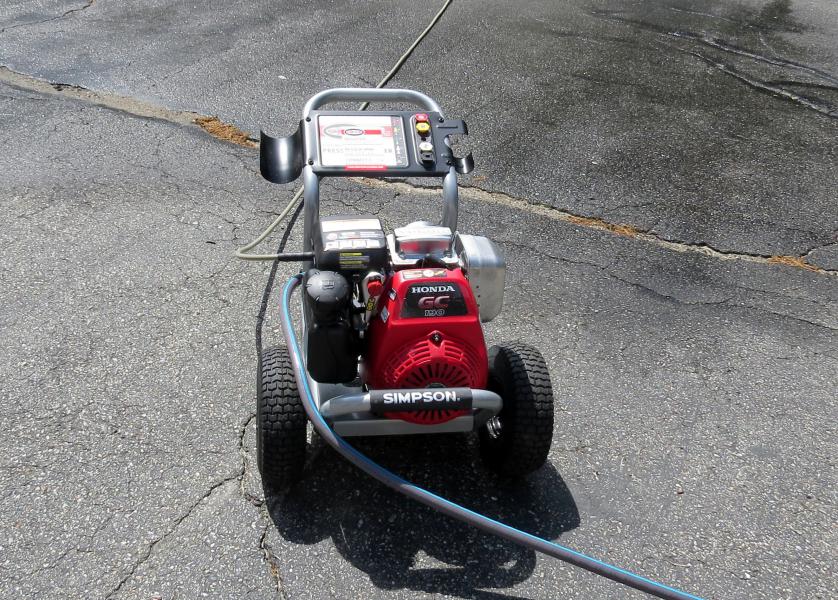
Simpson Pressure Washer
We have used the Simpson for cleaning masonry, outdoor furniture and very carefully to remove mildew from the bottom skirting boards (which are vinyl) on our house. Any time you pressure wash siding, you need to be careful not to push water behind the siding into the wooden sheathing. It takes a long time to dry out and is not good for the house. Clapboards are a particular dilemma. You really want to spray them from above; so the water will run off not behind the clapboards. You need to spray down from a ladder or scaffolding. Many a home owner (trying to avoid hand scraping old paint) has sprayed up from ground level and let the clapboards dry for a day or so. Then they paint sealing all that moisture in behind the clapboards… not good. All in all the Simpson does an excellent job. The recycled plastic Adirondack chair below was really filthy before Kristine washed it.
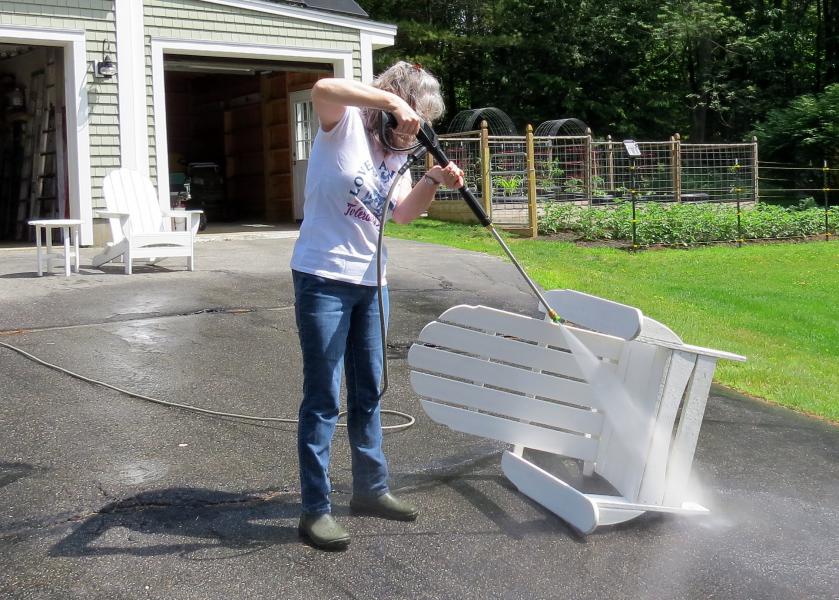
Power Washing Outside Furniture
Every winter we burn brush, often quite a bit of it. We have harvested many trees. We don’t waste much; the logs are either going to be firewood or lumber off our sawmill. The crown of the tree needs to be disposed of. I’ve said elsewhere that we have used tree companies for the really big trees that require a crane. When they come they chip the crowns. But we have cut lots of small to medium trees and their crowns become the burn pile. We also have to do a lot of pruning; that too ends up on the burn pile. Some years we burn only once, other years we have generated so much brush that we had to burn twice.
There are a lot of lilac bushes on our property. Many were not regularly pruned and have grown very tall, 10 feet or more and have thick unsightly main stems with most of the foliage up high. They look awful. We have been slowly cutting them back so we can enjoy the beautiful fragrant flowers closer to the ground. In the picture below Kristine is cutting the heavy stems out with her chainsaw. The saw is the perfect pruning saw, a battery powered Stihl. It is very lightweight at 8lbs, has a 12 inch bar and has about an hour of running time on a single charge. This is not a big box store cheap homeowner’s tool. It is a professional quality saw. And yes, it is priced like one. At $300 it is worth every penny. I will add one caveat. I’ve spent many hours of my life running chainsaws all way back to long before there were automatic oilers. Every time you put gas in a saw, you top off the bar oil. We all do it. But, with a battery saw it’s easy to forget. The saw will run out of oil long before the battery dies.
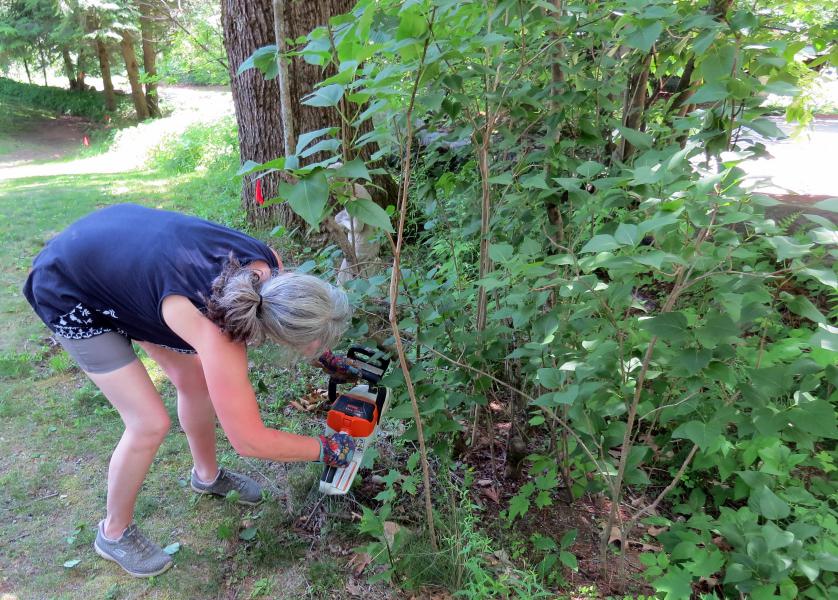
Kristine Cutting Back the Lilacs
I finally bought an orchard ladder this spring. With all the pruning we do, I should have bought this ladder years ago. I bought an aluminum 12 foot orchard ladder made by Marchant Ladders. I bought the ladder at Oesco in Conway MA (see the link above). Conway is in the middle of nowhere in the Berkshires but is well worth the trip. It is an old time grower’s equipment store with knowledgeable staff and excellent inventory. I can’t recommend them enough; it was like stepping back in time to an old school hardware store complete with creaky wood floors. The young guy who helped me let me try a couple different pruning shears on a bush outside. It was really refreshing and very different from the big box store experience.
Orchard ladders are tripods so they can be used on sloping surfaces. The rail side of the ladder (with the rungs) has a very flared base that tapers to a narrow top. The base of the rail side is 52 inches wide and has feet designed to dig into soft surfaces like the ground. The other side of the ladder is a single pole that can be extended out as little or far as you need. There is no folding brace limiting its travel. If you are facing uphill and the rail side is too vertical… extend the third leg until you get a comfortable angle. Not only does three legs allow set up on uneven surfaces; the single pole leg can tuck right into a tall bush or right next to and beyond a tree trunk to get you closer to your work. It is an amazingly stable work platform. In the picture below, Kristine is pruning a forsythia that we are trying to get back under control.
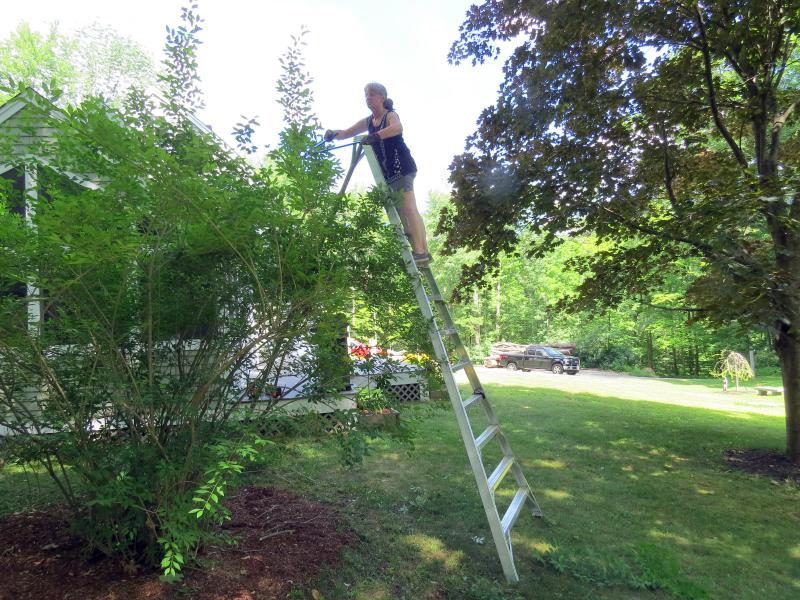
Pruning on the Orchard Ladder
I said above that we have taken down many trees ourselves. This spring I dropped an American beech that was about 50 feet tall. It was a nice tree but right in the middle of a circle of bigger oaks, I couldn’t even tell how tall it was; you couldn’t see the entire crown. I’m going to build a tree house for my grandchildren in that oak stand, the beech had to go. I have a log grapple that goes on my big tractor that is awesome for moving brush. I limbed the beech and made a big pile of brush, scooped it up and set out for the burn pile on the other side of the property.
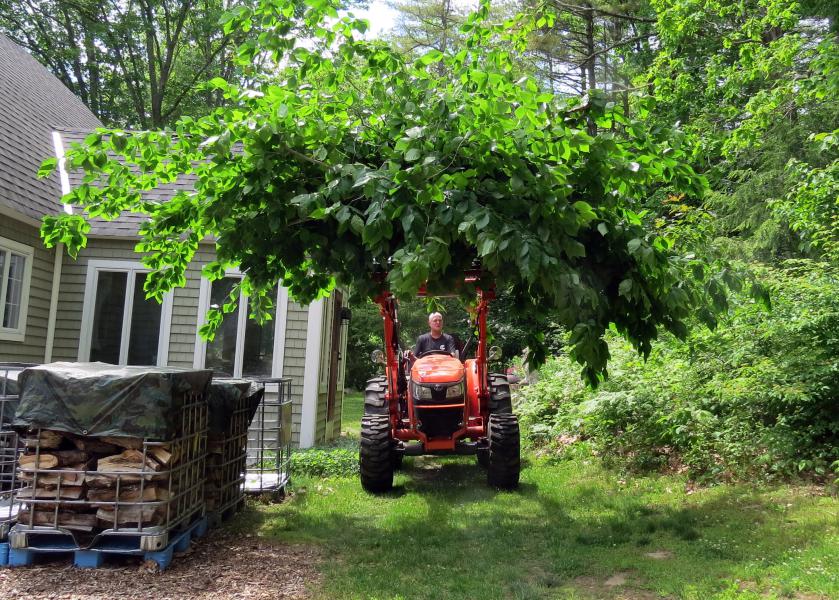
Moving the Canopy of an American Beech
The unruly beech canopy was a little tricky to get around and over a number of obstacles. I had to carry it high much of the way. For many years we hand dragged or loaded brush into my pickup to move it to the burn pile which meant we also had to unload it from the back of my pickup when we got there. Not only does the grapple pick up huge piles of brush, it sets them on top of the burn pile. We bought the grapple to move logs, particularly onto the sawmill. It is a Frostbite log grapple. It also moves stumps, boulders and can rip unwanted bushes right out of the ground. The grapple is very rugged and has been a huge blessing. It saves time and your back.
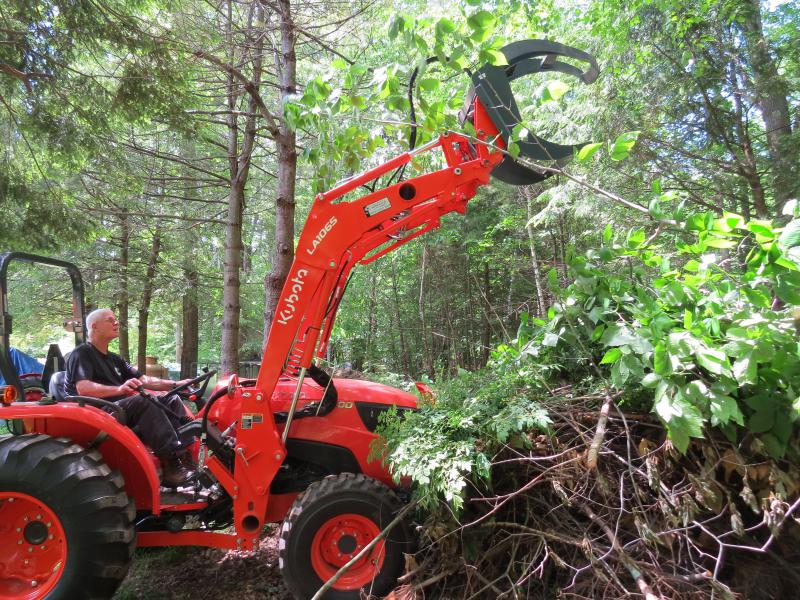
Dumping the Beech Crown on the Burn Pile
We usually burn in the winter when there is snow on the ground. It’s one of the times you can legally burn in the day time, at least here in New Hampshire. I’m not a big fan of staying up all night to burn. There have been a couple years that we had to burn in the warm weather as well… we simply generated too much brush. It’s looking like this summer, 2022, will be a summer burn year. A lot of people know that I burn often and burn big piles. I get a lot of questions, particularly from frustrated people who have trouble lighting their piles. Yes, it’s nice to burn after a lot of rain when everything is nice and wet, but that also means your pile is wet. This past winter we burned late, in the beginning of March. There was a lot of rain in January and then it snowed a bunch. Much of the pile was wet or frozen. I hollowed out a spot on the windward side of the pile and stuffed it with newspaper. You always should light the upwind side so the wind pushes the fire through the pile not away from it. It started but then faded. I grabbed my backpack blower to help it along, but it still died.
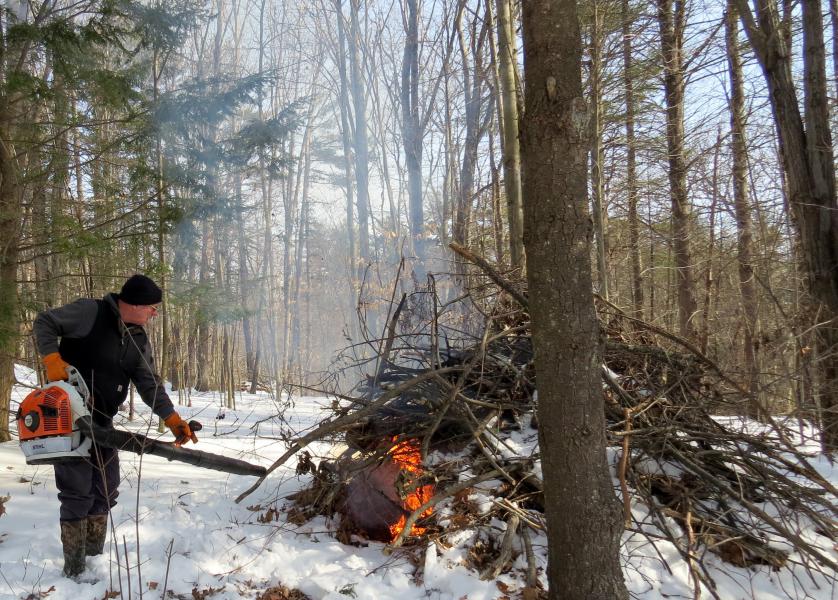
The First Unsuccessful Light, not Even the Blower Could Save the Day
So, this was going to be a tough light. I can do this; it’s just more prep time. The first thing I did was to toss the pile. I used a fork lift attachment on the front of a tractor to lift and fluff the pile. Most of the snow and ice slid off the top and I introduced air voids into the pile. Remember fire requires all three elements of the “fire triangle”: fuel, heat and oxygen. You can see the difference in the pile in the picture below. I broke up a bale of hay and stuffed flakes into the voids. I splashed a couple cups of diesel fuel on the hay. Please don’t use gasoline, the vapors are extremely volatile. You can also use charcoal lighter fuel safely. My ignition source is a weed torch with a long hose attached to a 20lb propane tank. They work great for this.
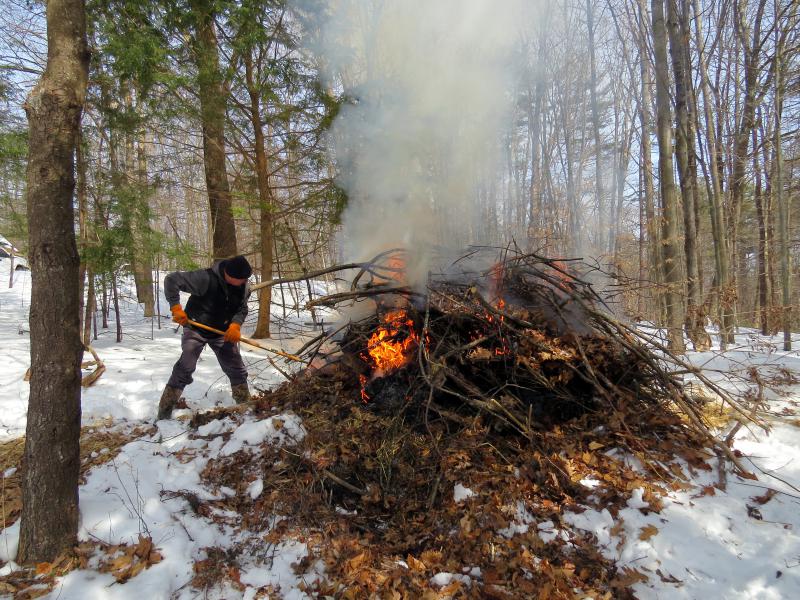
Stoking the Second Light
The second light went much better. In a less rainy winter my more casual approach to the first light usually works. I probably used the blower on the second as well, it helps a lot. In the picture above I’m using a garden rake to push more fuel into the voids. You need to pay close attention during the early stages of the burn to get the fire well established. In the picture below, Kristine is using an 8’ pike pole (a professional firefighter’s tool) to pull fuel into the fire. Having been firefighters we are both well familiar with the poles. They are perfect for reaching across a hot fire to pull fuel in from the other side. I bought the pole years ago and we use it on every burn. If you want one, they are available to the general public. They are not all that expensive, I think I paid $130 or so, they are probably a little more now. The rub is that because of their shape and length, don’t by anything less than 8’, it costs more to ship than the price of the pole.
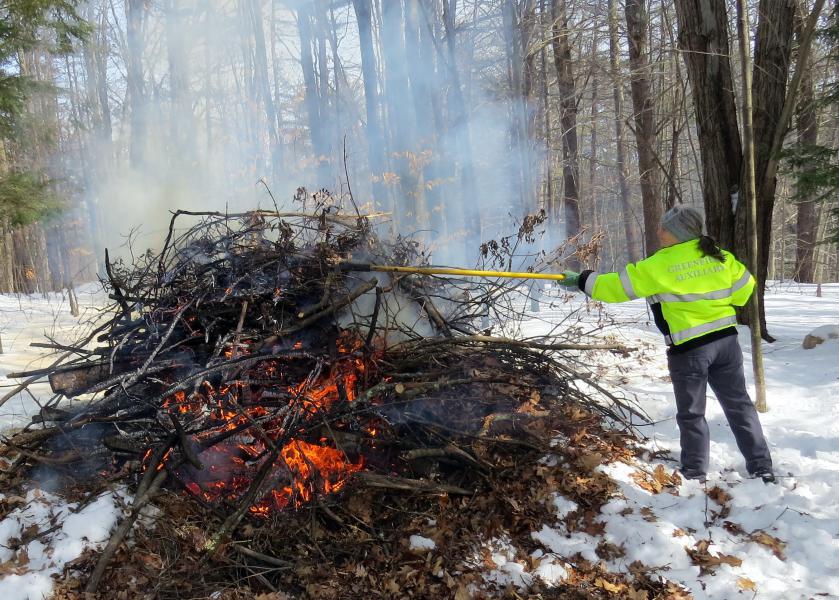
Kristine Pulling More Fuel In
In the next picture the pile is just rocking along; hot, well lit and going to the ground. The expression on Kristine’s face says it all. It got above 30 degrees and the sun came out. The fire was nice and warm. We set up camp chairs and a little table a few feet from the fire and had a romantic fireside lunch. It was awesome!
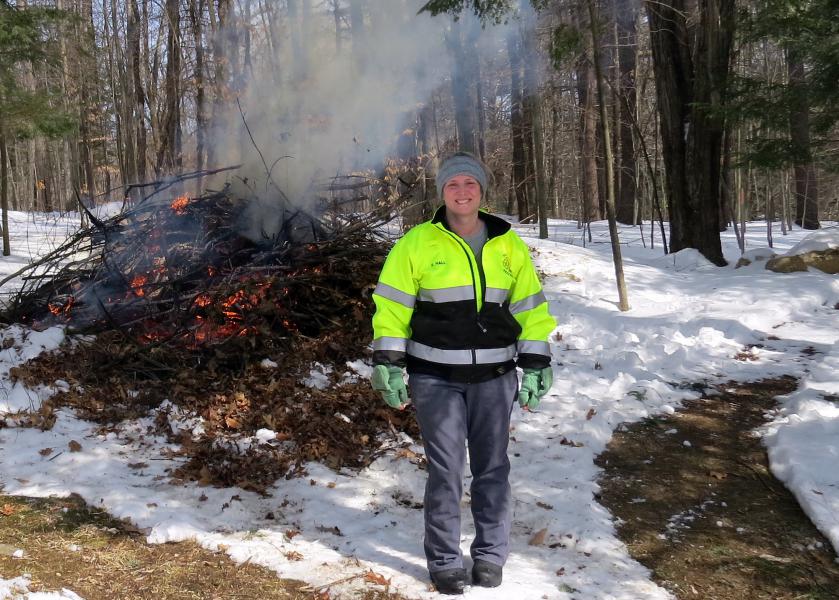
The Happy Burn Boss
Near the end I brought the little Kubota out with a bucket on to push the fire in from several sides. When that burned down I raked the fire out and back in a couple times in the last couple hours. If you don’t do this you will have a lot of unburned brush buried in the ashes. My goal is a very complete burn, nothing but ash left. I think the whole burn took about six hours which is pretty typical. So it is true that having equipment like a tractor makes burning easier. But you can do it without a tractor, we’ve done it in the past, it’s just more work.
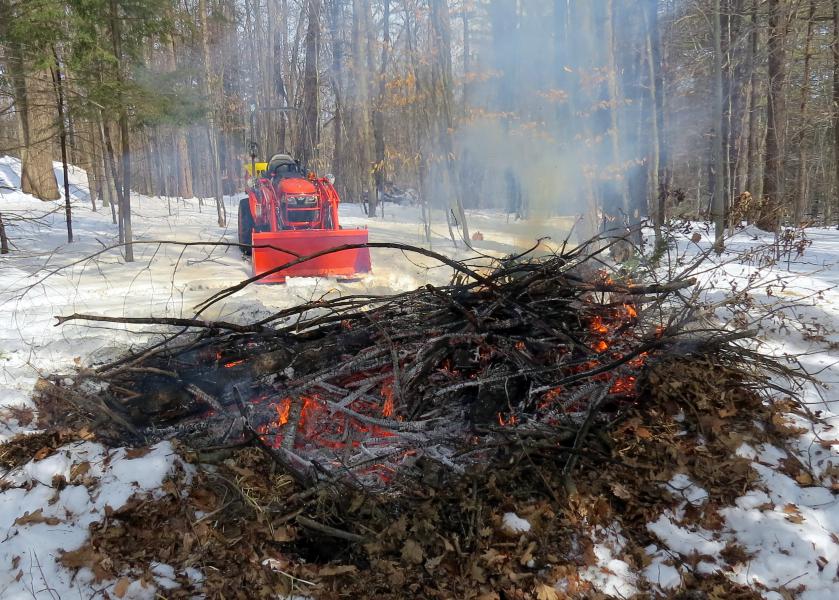
Brought in a Little Help Near the End to Consolidate the Pile

Recent Comments